Do you want to display the form entries to your customers? do you want to create stuff like listings, calendars, or tables using your WPForms entries? If so this tutorial is for you.
Using Page Builder for WPForms it’s very easy to display the form entries to your customers, and the best thing is that you just need to use an elementor-like designer to build your page, no coding skills are required.
To display the entries on a page follow these steps:
1.- Install Page Builder for WPForms if you are not sure how to do this you can follow this guide. You can also get the full version of the plugin here. No pressure though, I just drop the link here in case you are already convinced that the plugin is the right for you.
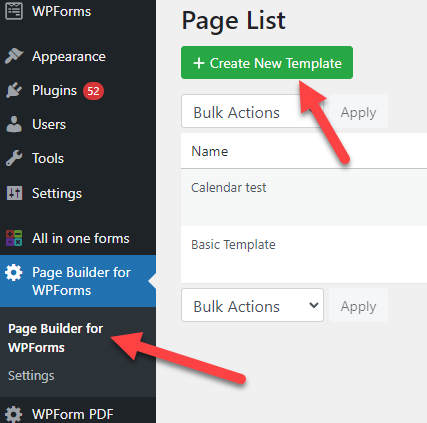
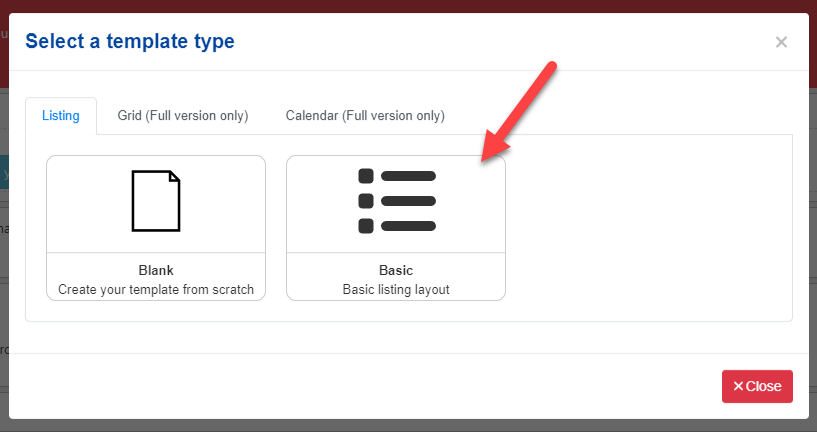
2.- Once installed and active click in Page Builder for WPForms and click on “Create New Template”
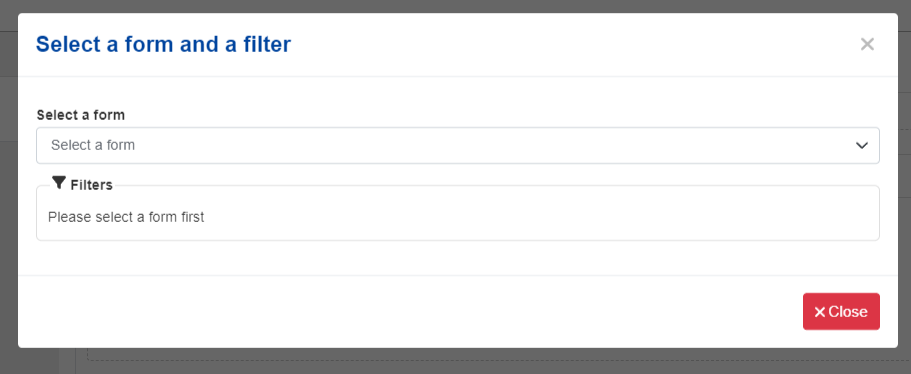
4.- Select a form and if you want add some filters (more about this later)
5.-Configure the page as you want it. If you are familiar with Elementor you will find many similarities with it. If you are not familiar with it don’t worry, basically, you just need to drag and drop stuff around to build your page.
6.- Save your template and that’s it! you have created your first page. You can click on the preview button to see your listing in action.
Adding a search bar to your listing
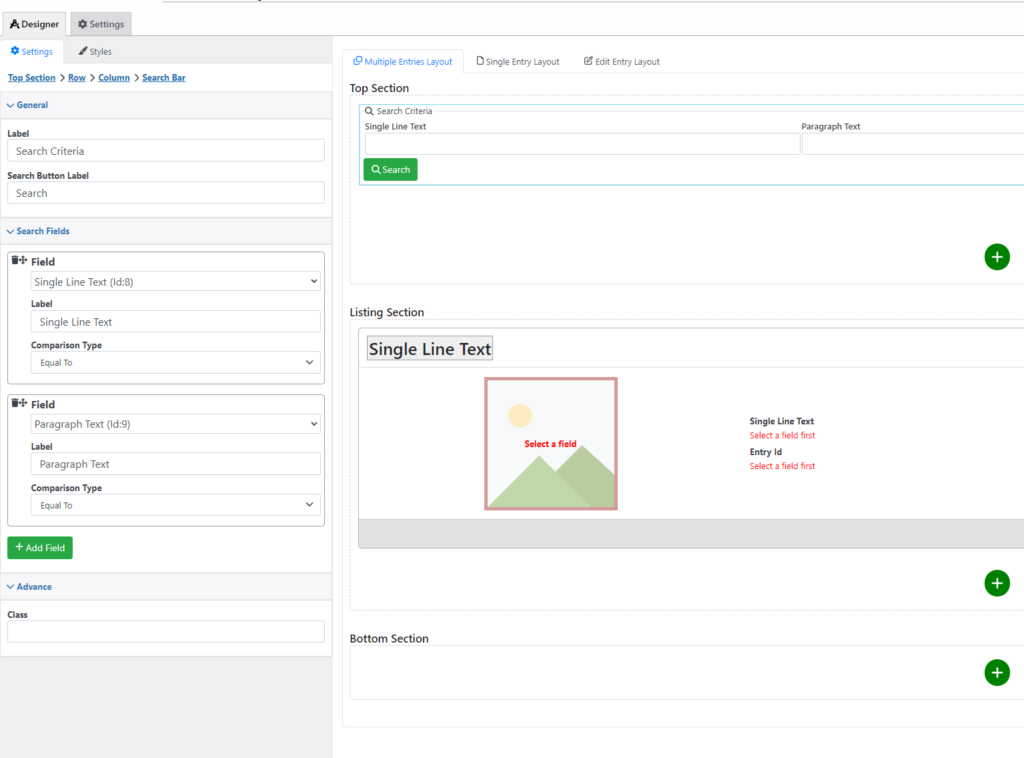
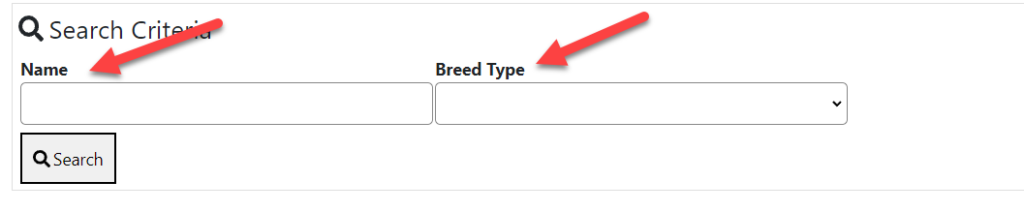
Of course, no listing page can be completed without a search bar. After all, your customers don’t have time to look at all your entries and just want to find the one they need. The basic listing template already comes with an empty search bar. You just need to add some fields to it.

But in case you need, you can add a search bar to any template easily:
Now with your search bar in place, all you need to do is add fields to it. The fields that you add are going to be the fields that your customers can use for searching.
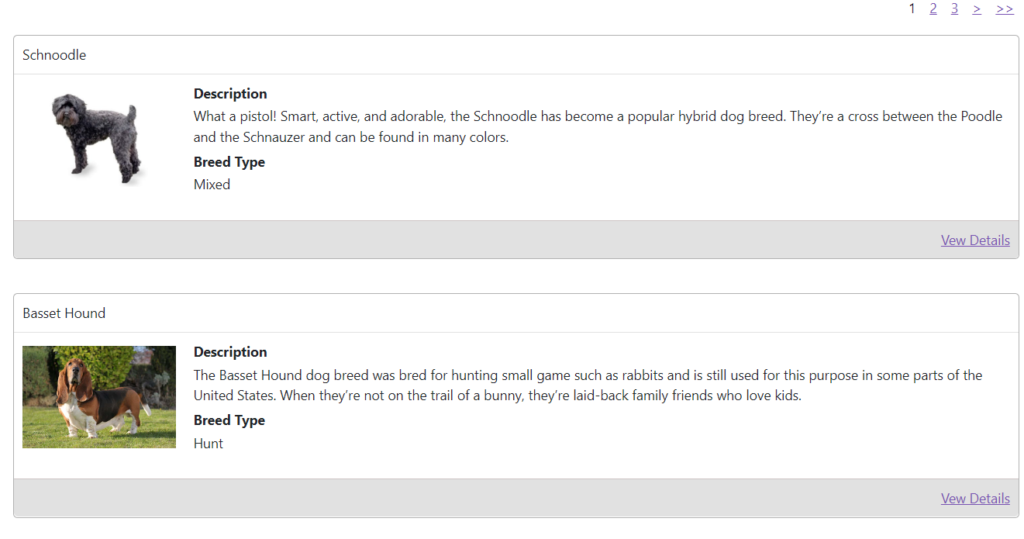
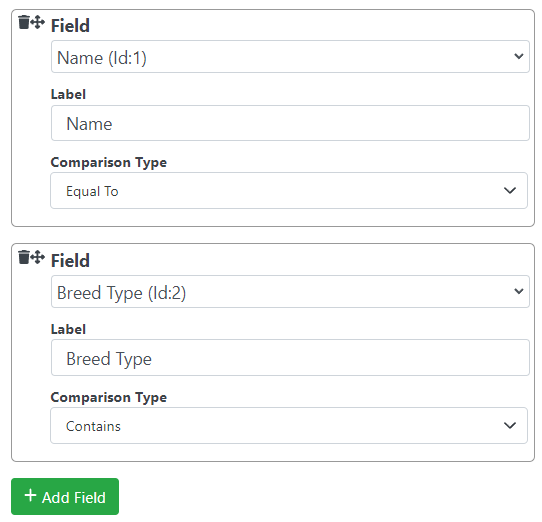
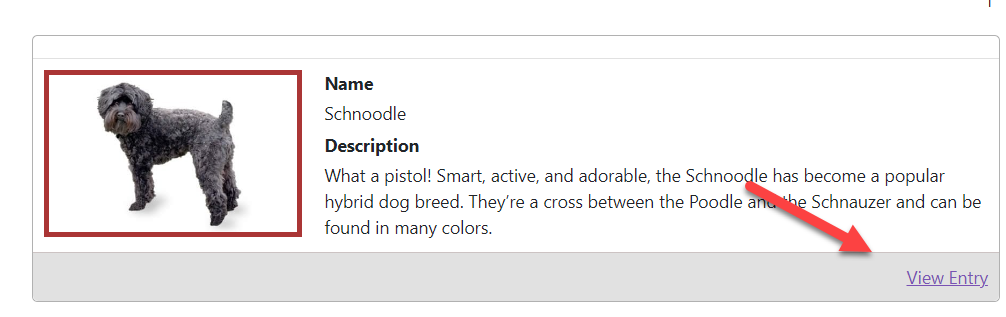
In the example below I will let my customers search by Name and Breed Type (btw my listing is about dog breeds which you can see here)
And just to be clear, this is what each setting of the previous screenshot do:
Field: The field that you want to use. In the example above I will let my customers search by Name and Breed Type.
Label: The label that each searchable item will have. Generally will be the same as the field name but you can change it.
Comparison Type: The kind of comparison that the plugin uses to filter the wpform entries. For example, for a date field, you could use the Comparison Type “Greater than” to display only the entries with a date greater than what the user typed.
Display form entries details
In a listing, you generally want to display the most important information on the main page. After the user clicks on a link or something they can see details of a specific entry. In the following section, you are going to learn how to do this.
If you haven’t noticed already, there are 3 tabs at the top of the page designer. In these tabs, you can configure all the different layouts that your page is going to use.
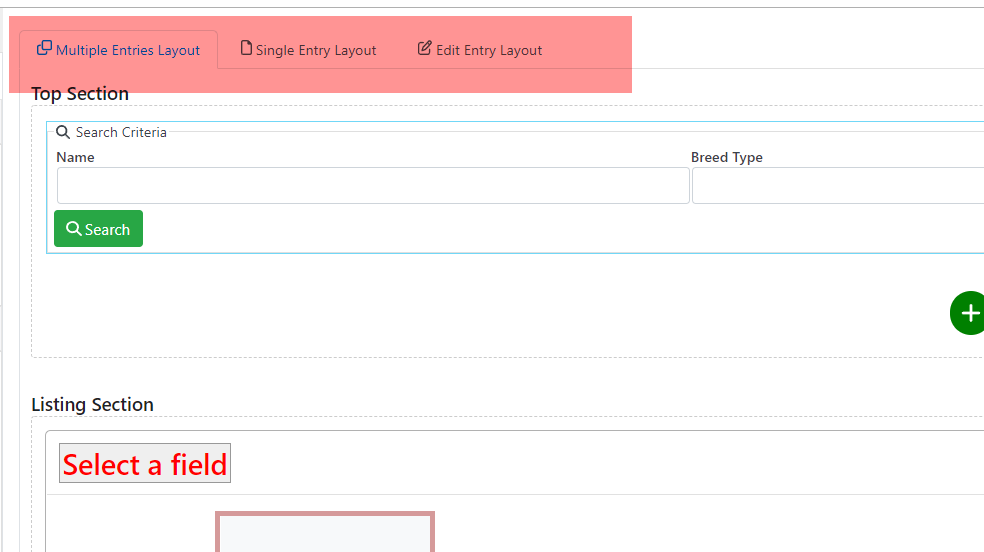
Each layout is used at different times:
Multiple Entries Layout: It’s the main layout. This one display each entry on a single page.
Single Entry Layout: When the users want to see the details of an entry they are going to see this layout.
Edit Entry Layout: Used when the users want to edit an entry. And in case you are wondering, you can configure which users have rights to edit an entry or you can just not let anyone edit any record.
So far we have only worked in the “Multiple Entries Layout” so it is time to work in the “Single Entry Layout”
This layout is pretty similar to the other one, again, the only difference is that this layout is going to be used when the user clicks on the ‘View Detail’ link. For this example, I am just going to add a few fields
Adding a view detail link
By default, the basic listing template already has a view detail link
But you can create your own by selecting any text that you add and clicking on the link icon
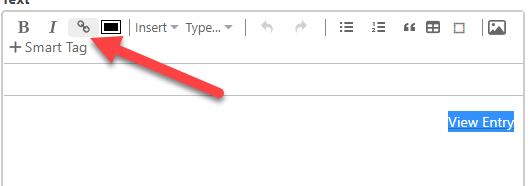
Then in the “Link to” setting select “View Entry”

And that’s it!
Now my listing also has a “details” section. As explained previously, this section is visible when the user clicks on the ‘View detail” link.
Adding additional filters to your wpforms entries
You can let your users filter through your listing using a search bar but you might want to add some forced filters. Maybe you just want the users to see the entries submitted by them or only the entries created this month.
To add this kind of filters go to the settings tab and click on “Filter”
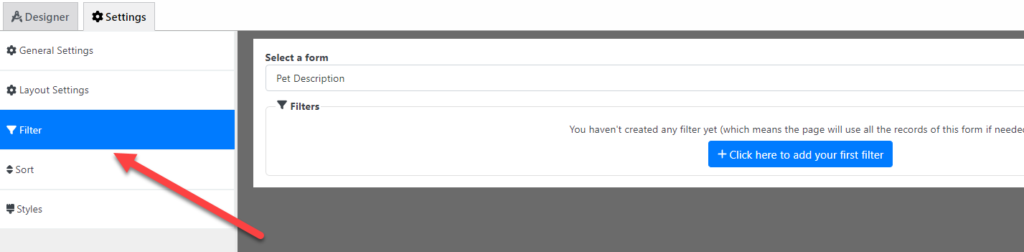
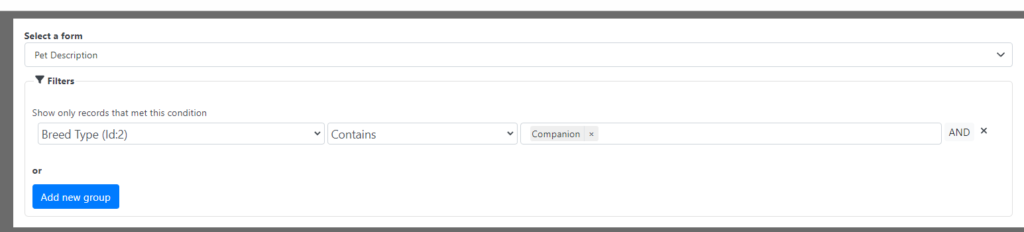
Then click on “Click here to add your first filter” and add as many filters as you want. As an example, the filters below would make the page only display the “Companion” dogs
Sorting Entries
Lastly, you might also want to sort the records by date or creation date (just to name a few). You can do so in the ‘Sort’ section
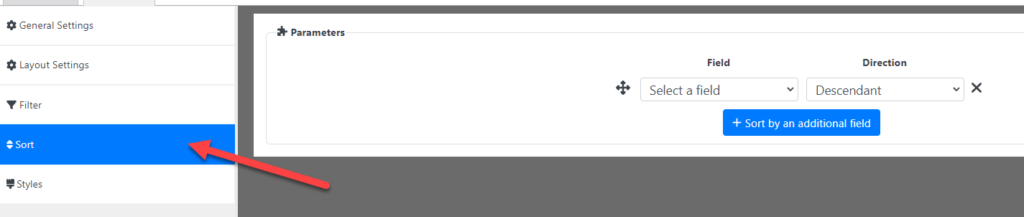
Here you just need to select the records that you want to use for sorting and their direction (ascending or descending).
Conclusion
You learned how easy is to display your form entries of WPForms on any page. In this tutorial, we created a listing page but the plugin can create so much more.
Maybe you want to create a calendar of events (and let your user schedule a new one) or you want to display your records in a table or maybe even do something different like creating a table of “Top Donors” from your campaign. We are going to explain how to do all of this (and more) in future tutorials.